Introduction
Sending SMS via the portal is fairly straightforward. There are lots of additional tools that you can use that add complexity to the process, but these are only required if your individual use case requires them. We will endeavor to go through all the options available when you send out SMS, so you are aware of all the features available to you.
We will assume for this that you...
A). have SMS credits to cover the message(s) you plan to send
and
B). Have you contact numbers already present in the SMS portal. A separate guide on uploading contacts is available here.
Process
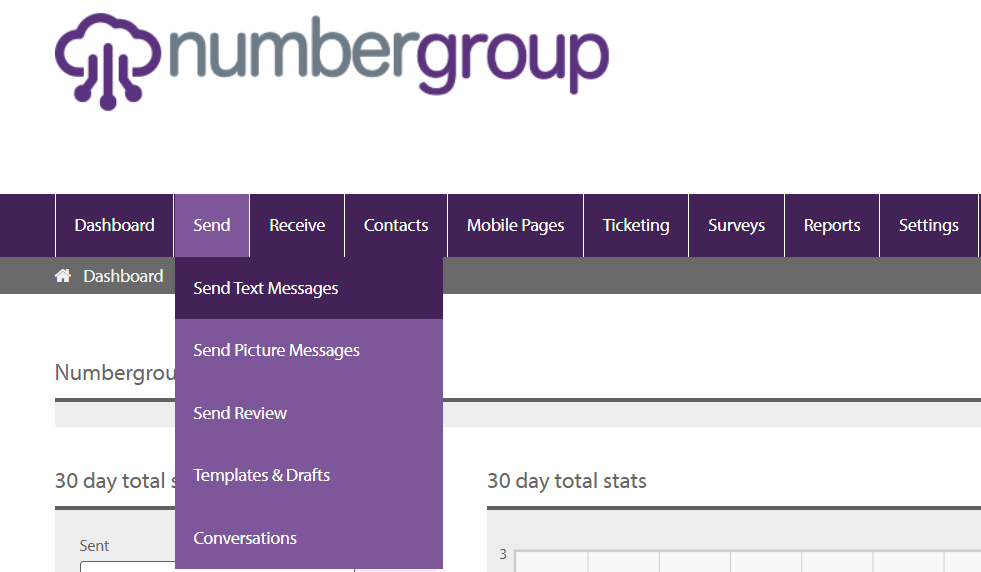
- Log in to the portal at https://sms.numbergroup.com using your username and password
- Goto Send -> Send Text Messages
- The first step is to choose who you are sending the message to. There are a number of contact options, including groups, Inboxes, Contacts, Search, Paste List, and Single. The options meanings are listed below...
 Groups - Groups are pre-made collections of contacts. If you use this method of picking contact(s), you can select one group from the list. The SMS will then be sent to everyone in the selected group.
Inboxes - Inboxes are used to organize inbound SMS traffic. The system logs who have sent messages to each inbox. Using this method allows you to send an SMS to all contacts who have sent an SMS to one of your inbound mailboxes.
Contacts - This provides a list of all contacts not contained within a group. They are classed as "Individual" contacts, and this system of selecting sendees allows you to select from the list of contacts whom you would like to receive the SMS.
Search - This allows you to search your contacts list. This is useful if you have a large number of contacts and need to find and select particular contacts from your contact list.
Paste List - Use this function to paste a list of numbers into the portal, for a "one-off" sending list. Please ensure that the formatting is followed correctly, to ensure that the system interprets the entries correctly
Single - Allows you to enter a single number to send the SMS to.
Once you have chosen the contact(s) you want to SMS, proceed to the next step. - The next section is where you specify the sender's name/number, format the message and specify additional options.
 The Sender Name box allows you to select what name/number you want the SMS to be sent from. You can select already created names from the drop-down list, and you can also add new ones, by selecting the drop-down menu and choosing "-- Add Sender --". You can also choose to use the Simple Reply Service (more info here) to send your message(s).
 - Once you have selected your sender's name, you need to format your SMS message. You can use a pre-existing template if you have already created one. If not, you simply enter the SMS you want to send in the Message box. You may note that there is a box titled "Insert Merge Fields". These are text markups, which allow each SMS to be customized, per sendee. The markups are linked to the customer contact fields which are stored within the system. For example, if you have entered the first name of your contacts, you can use the markup '#FirstName#' to enter the contacts first name in each SMS. There are 5 markups in total, 3 custom ones (which you can amend to whatever you wish) along with first name and surname.
- Along the bottom of the message screen, you will see 6 icons. These allow you to add/attach things to the SMS message. The options are as follows...
- Attachment - This allows you to attach a link to a file, such as a picture, document and more. When you click on the icon, you will see a pop-up window, like below...
 If the SMS is sent to a "smart" device, then they will usually try to resolve the link. So, for example, if you attach a picture to the SMS, the phone in question will try to resolve the link picture, so it displays the picture in the SMS application on the phone. Otherwise, the user can click the link to access the content.
 - Mobile Web Page - Link to a mobile web page you have created previously. This feature allows you to make custom mobile web pages, to display certain information to mobile users. These are separate from other web pages and are created within the portal itself. For more information, check this article out.
- Short Link - This allows you to create short links to other URL's, saving you precious characters in your SMS message. When you select the icon, a pop-up will appear which looks like this...
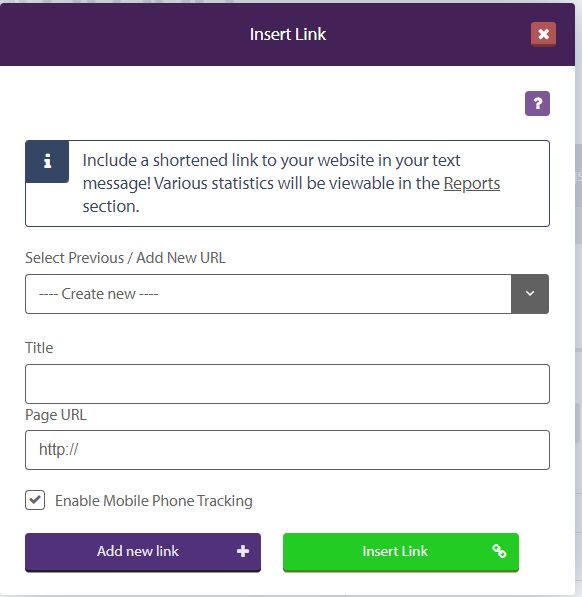
Links that have been made previously are saved and can be accessed from the drop-down list. Otherwise, you can create a new link, by giving it a title and entering the URL you want to link to. This will create the short link, and when you click on the insert link icon, this will be placed in the SMS message. You can enable mobile phone tracking, which will allow you to see what phones are using your link. - Survey - This allows you to insert a link to a pre-designed Survey, which you create within the portal. For more information, please see this article.
- Ticket Code/Ticketing Link - Allows you to attach a pre-designed code, which links to a ticket. This can be a discount voucher, or a mobile wallet, with funds to spend on your website, for example. For more detail, please see this article.
- Attachment - This allows you to attach a link to a file, such as a picture, document and more. When you click on the icon, you will see a pop-up window, like below...
- Once you have completed formatting your SMS message, you need to review it before sending it. The portal will display the number of characters you have used, which will give you an overview of the credit cost per customer it will cost to send the message.
- The next step is to configure any additional settings you may require, before sending the message. If none are needed, click the "Send Message" button. The screen will display an overview of who you are sending the message to, and the cost for doing so. If you are happy, click the "Send Message" button. However, if you need to specify additional settings, please continue below.
- If you need to schedule the sending of the SMS, you can use the "Schedule" tickbox and drop-down menus to specify on which date and time you would like the message(s) to be sent out. This could be useful for promotional SMS messages that you may want to schedule prior to the event in question, for example.
- The last option on the main page is to offer an opt-out option. If you are sending marketing SMS, then you have to provide users with the means to remove themselves from contact lists. You can use the "Include Opt-out message" section to do just this. If a user chooses to remove themselves, their details will be added to the "opt-out" list against a contact list, if present. This will ensure that you do not continue to contact users who have opted out of these types of messages.
The final 2 options are advanced ones and are also optional. They are found under the "Advanced Options" menu at the bottom. If you expand this section, you are presented with 2 options, "Segmented" and "Validity". Segmented sending allows you to segregate the sending of messages to a large number of contacts. The idea being, if the offer proves to be popular, you do not get swamped with responses and queries all at the same time. Using this, you can segment sending between 2 times, at varying time gaps.
Validity is used if you have a time-limited promotion. If the SMS is only valid for a certain period, then you can set this period in this section. This means If the recipient phone is switched on then the message will arrive within seconds of being transmitted. However, if the client switches on after the event, you can ensure that messages will not be delivered after this time.
This covers most aspects of sending SMS via the portal. You can also use our API to perform calls to automate the process from external sources. If you have any questions on the above or the API, then please contact us on 08003101010 or e-mail support@numbergroup.com with your questions.